
 091-409-8517, 02-630-9938
การตั้งค่า Thunderbird เพื่อใช้งานในการรับ-ส่งเมล์
คู่มือการ Set thunderbird
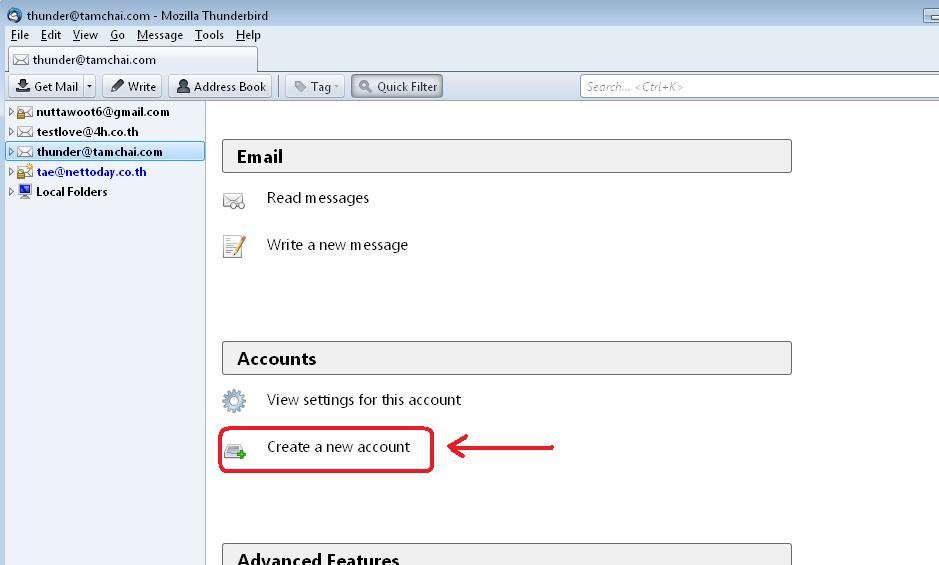
1. เปิด thunderbird ขึ้นมาแล้วไปที่หัวข้อ Accounts แล้วเลือก Create mail account
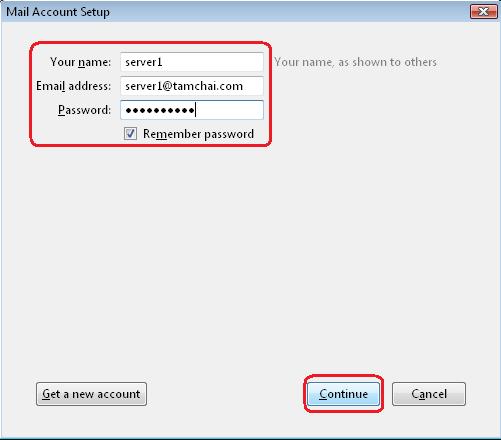
2. จะเข้าสู่ Mail Account Setup ให้กรอกรายละเอียดดังนี้
Your Name : กรอกชื่อ เช่น Server1
E-mail address : กรอกอีเมล เช่น server1@tamchai.com
Password : กรอกพาสเวิร์ด เช่น xxxxxxxxxxx
แล้วกด Continue
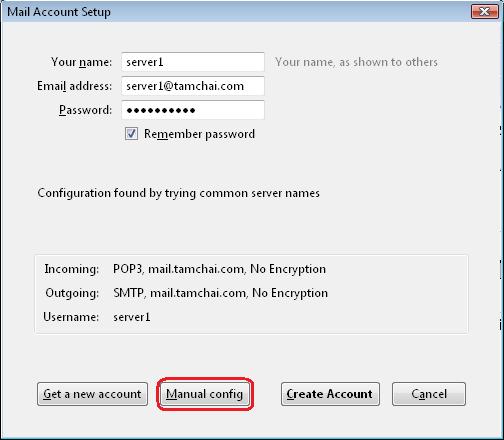
3. หลังจากกด Continue แล้วรอซักพัก เรายังจะอยู่หน้า Mail Account Setup แต่ให้เลือก Manual config
4. หลังจากกด Manual config แล้วเรายังอยู่หน้า Mail Account Setup ให้ Set ดังนี้
Your name, Email address, Password ให้คงเดิมไว้
Incoming : ให้เลิก POP3
Server hostname ให้ใส่ Mail.ชื่อโดเมนเรา เช่น mail.tamchai.com
Port ให้เลือก 110 / SSL ให้เลือก None / Authentication ให้เลือก Normal Password
Outgoing : ค่า default จะเป็น SMTP อยู่แล้ว
Server hostname ให้ใส่เหมือนกันกับ POP3 เช่น ในตัวอย่าง คือ mail.tamchai.com
Port ให้เลือก 25 / SSL ให้เลือก None / Authentication ให้เลือก Normal Password
แล้วก็กด Re-test เพื่อทดสอบ

หลังจากกด Re-test แล้วจะขึ้นข้อความนี้ The following settings were found by probing the given server ถ้าตั้งค่าผิดมันจะฟ้องว่า Thunderbird failed to find the setting for your e-mail account ให้ไล่เช็ค step ที่ผ่านมา หลังจากนั้นให้กด Create Account
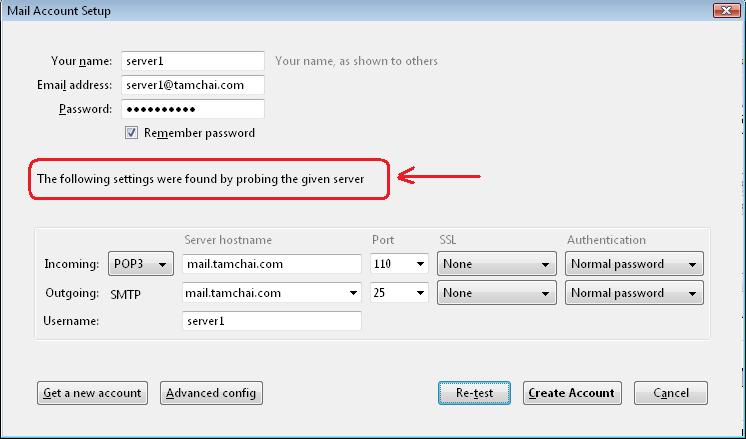
ในกรณีที่ Set ค่าถูกต้อง
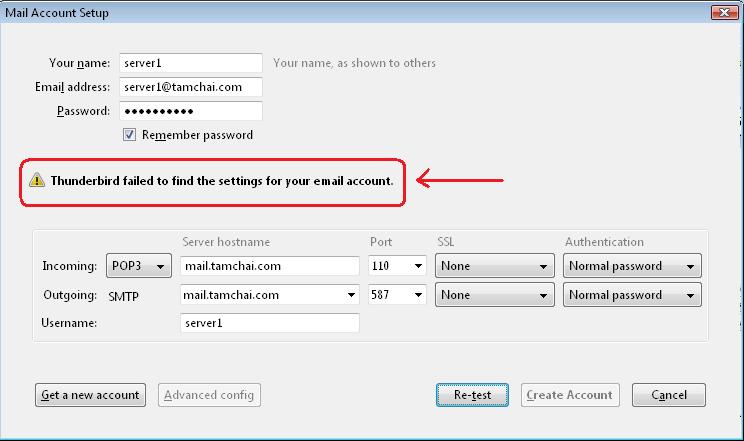
ในกรณีที่ Set ค่าผิด
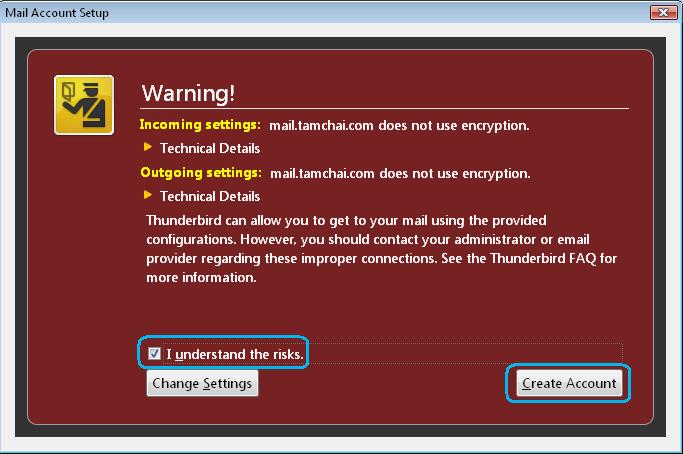
5. เมื่อกด Create Account แล้ว ระบบจะแจ้งเตือนว่า ไม่ได้มีการเข้ารหัสข้อมูล ให้คลิกเลือก I understand the risks. แล้วกด Create Account
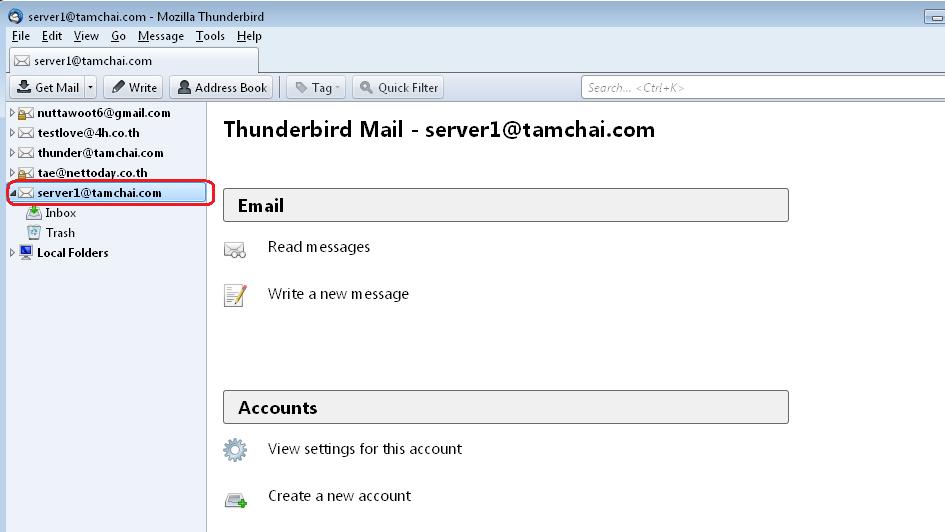
6. เมื่อกด Create Account แล้วก็เป็นอันเสร็จสิ้นเราเห็นว่ามี Account เพิ่มขึ้นตามภาพ ให้ลองทำการทดสอบ Test รับ-ส่งเมล ได้เลยครับ